Thursday 7 April 2011

Evaluation

The overall animation has very well stuck to the original storyboard there are some scenes that have been edited in different ways, contain additional material or do not include sectors that were in the storyboard. This is because any alterations that were considered were to improve the animation or to simplify it.
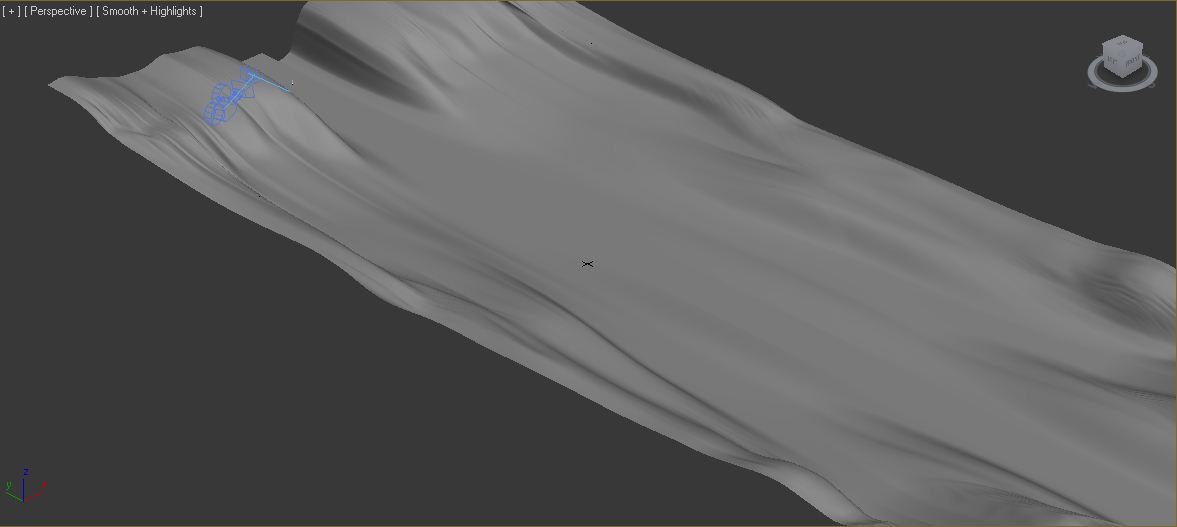
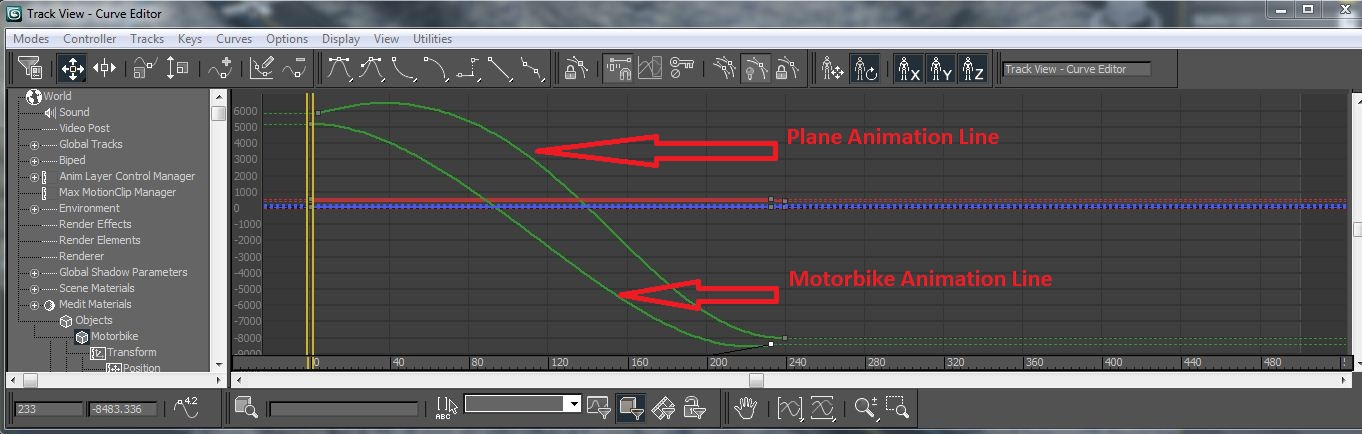
During the production in some of the animation scenes there were areas that were difficult to animate, one of these scenes being the aeroplane and motorbike chase scene. Here in this scene it became a difficulty getting the aeroplane propeller to function correctly, the aeroplane was continuously deleted and re-imported, however this did not appear to resolve the problem. Eventually the propeller was scrapped and a simple long rectangle and cone were put in its place to attempt to replicate and achieve a smooth rotating propeller.  The overall result was not a desired smooth rotation but did give the impression of a rotating propeller.
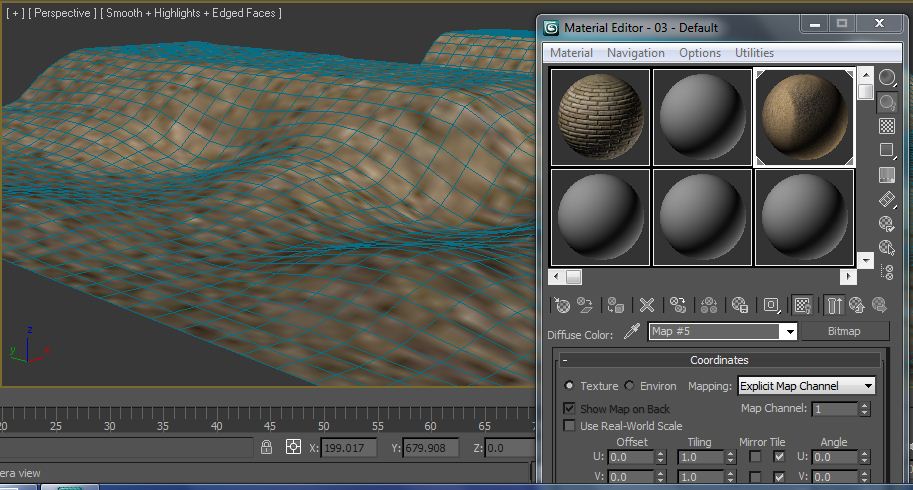
90% of the animation techniques used within the design and creation process have been successful and have been implemented into the animations well. The techniques used within can clearly be seen in the overall rendered animation, with smooth and well controlled scenes. The scenery details are clear and draw the objects of animation out. The scenery has been some of the most successful objectives to achieve as these were not considered when designing the storyboard. The design and engineering that influenced the creation of each of the scenes were taken from images on the research and mood board, including clips from previous bond trailers. Although not a full accurate detailed display of the scenery used in the making of the movies, the scenery however does display a similar replicated environment for the animated objects.
Having now completed the animation it has been a great learning curve and will allow me to use these techniques when I continue to study through to my third. The skills that were learnt in the 2D animation in the previous modules have been a great advantage towards structuring and animating the 3D project. It has allowed me to produce a clear and accurate storyboard and to follow a design structure that I have previously used in other animations to assist in the progression of my work. I have learnt many new techniques through the pathway of this module and has enhanced my knowledge with creating and producing animation scenes.

Animating the Plane Chase

Creating the Scenery


The scenery consists of a large plane converted into an editable poly. Using the soft selection tool similar to the creation of the Goldeneye Train Scene the plane was shaped into a landscape.


Using mapping imported, this was then loaded onto the plane and a UV mapping modifier applied to enable adjustment of the material.


A 'sky' image was applied to the Environmental Maps to give the sky background. This can be found under 'Rendering - Environments / Background Maps.

Animating and Camera’s

Both the Animated Plane and Motorbike along with the James Bond Figure constructed using the Biped was imported into the scene.


Using the Key fames on the timeline both the Motorbike and the plane are animated so that they move along the scenery towards the other end.


By using the Track View – Curve Editor, this enabled me to adjust the speed variation of each of the moving objects. It was important that the motorbike gets closer and far away from the plane as it is chasing it. This gives a more realistic chasing effect when animating.  


To capture the chase two target cameras were added to the scene, the first one to view the plane and motorbike beginning the chase and the second camera to capture the chase half way through the scene. These target cameras were linked to the objects by using the ‘Link’ tool in order to make the cameras follow the movement of the objects.


The 'Link' tool.


Animating the Motorbike, Plane and Biped

Animating the Plane

Plane Creation

The plane was created originally from a rectangle that was converted into an editable poly. Using an Aeroplane image on a plane I then crafted the main structure of the planes body including tail wing and then deleted the image I was using to shape from.


Once the planes body was crafted on one side it was duplicated and mirrored so that the two parts could now be welded together and a turbo smooth modifier added to them to create a smooth effect.


After Mapping Applied:


The process for the creation of the body of the plane is almost identical to the creation of the wings.


Once the plane was completed simple landing gear was created from the ‘Damper’, ‘Cylinder’ and ‘lathe’ tool to make a simple wheel on suspension.


The landing gear was added to the aircraft and so was self created material mapping for the plane and wings.
The material used for the plane was created using Windows Paint.


The rotating propeller was created but rotating the propeller over a few key frames.


To enable the propeller to continuously rotate the ‘Loop’ tool was switched on in the Track View Curve Editor.


Motorbike

The motorbike is a 3DS Max file imported from a website, I slowly begun to run short on time and found that self creating more objects was becoming time consuming.


Animating the Motorbike and Biped

James Bond Figure and Biped

To create the James Bond Figure I used a pre-made figure that was imported to the scene.


Using the ‘Biped’ tool I created a skeleton inside of the figure and linked the sectors of the Biped parts to the figure. This was done by adding names to each of the Biped parts and applying a Physique modifier to the figure in order to attach the biped sectors inside.

Once all of the sectors of the Biped were loaded into the Figure I then edited the Envelopes, this can be found within the Physique modifier. This enabled me to edited the envelopes and adjust how and what parts of the figures skin was affected by each sector of the Biped.


Testing was carried out to ensure all sectors of the biped were affecting the correct areas of the figure upon movement.


Once all was completed the final figure could now be moved into shape in order for it to be placed onto the motorbike object.   


The rotating of the wheels was done in the same way as the Aircrafts propeller and using the loop tool in Track View - Curve Editor to make it continuiously turn.


Once the creation of these animations where finished they were saved and ready for importing into the plane chase scene. 

Animating Goldeneye Train and Explosion

Animating the Goldeneye Train

This scene consisted of using my object Artifact - The Goldeneye Train. I also created train tracks, trees, a tunnel and landscaping for this scene.  

Train Track and Tree


The train track consists of simple shapes, such as the track sleepers and bolt nuts created from hexagons and boxes. The track itself was created from a long rectangle and edited into shape using the editable poly. For the tree creation please refer to: Artifact 5 – Scenery Tree

Materials were then added to the train track, sleepers and bolts.


Landscape


The landscape to the scene is a very large plane, converted to editable poly’s and then with the ‘Soft Selection’ tool on, the plane was shaped into a landscape design.


I then added a texture mapping material to the plane, using the bump tool to give it more depth and UV Mapping to adjust the material layout.

Tunnel


The tunnel was created from the outline of an image of the front of a tunnel using Adobe Illustrator. By importing the image into 3DS Max I then applied the extrude modifier to turn the tunnel into a 3D model.

Material mapping of brick work was then applied with a bump modifier and UV Mapping in order to adjust the material mapping.


Moving Train (Part 1)

For the creation of the Goldeneye train please refer to: Artifact 3 Goldeneye Train

The Goldeneye train was imported into the scenery along with the Smoke that was created from a superspray in the first opening scene, Smoking Text. I then added the smoke along with the smoke material onto the train. The train was then grouped together to enable easier movement via the Group Tool.


Using the timeline and key frames the train was animated so that it would move out of the tunnel and towards the other side of the scenery.

Start:


End:


Using the Track View Curve Editor, this enabled me to adjust the movement of the train so that it would slowly come to a stop, not just a complete sudden stop. This made the movement of the train more realistic.


Using a Target Camera enable me to produce an animation effect where the camera follows the train in its movement. The train was linked to the camera using the ‘Link’ tool.

Once happy with the settings and setup this first section of the scene was rendered.

Exploding Goldeneye Train (Part 2)

Keeping the Goldeneye train in the same position as from the previous scene I used the ‘Mesh Bomb’ tool, this can be found in the ‘Space Warps – Geometric’ category from the creation panel. Once the Mesh Bomb was planted underneath the Goldeneye Train I then edited the settings to create a smooth outward explosion of the train.


Settings are as follows:

Explosion:
Strength = 1.3
Spin off = 1.0
Fall off =  100.0

Fragment Size
Min = 5
Max = 20

Gravity = 1.07

Once these settings were applied I then used another creation tool known is 3DS Max as ‘SphereGizmo’. This fire explosion effect can be found in ‘Helpers – Atmospheric’ creation panel.  I used this creation tool to give the impressive explosions as the Goldeneye Train is ripped apart with the Mesh Bomb tool. The ‘SphereGizmo’ was then placed and sized onto the scene.


In the modifier panel of the SphereGizmo the ‘Fire’ effect was loaded.


Then going into the setup panel of the Fire effect I made adjustments to the Fire explosion here, I modified settings to enable the explosion to be the correct timing of the Mesh Bomb explosion and to last just as long. The size and force of the fire explosion can also be modified in this setup panel along with the smoke and other colour effects.

To create the skyline effect a 'Sky' image was imported into 3DS Max and placed as a background map. This is done by adding the image to Rendering, Environment then Background mapping.


Once happy with the settings this second section of the scene was rendered.

Tuesday 5 April 2011

Animating Exploding 007 Text

Animating the Exploding Text
The exploding text was originally created in the first part of the assignment. It is based on the use of the reactor ‘Rigid Body Collection.
Stage 1 of Impact:


After Impact:

The animation and making process of breaking up the text can be seen earlier in the report.
  • Refer to: Artifact 2 – 007 Logo
After importing the animated text onto the scene the same process with the lighting was used to give the fog effect. Similar scene background is also used because the bullet travelling from the Walther PPK handgun will now smash its way through the logo.
The timing of the bullet striking the logo was edited and adjusted using key frames. By using the ‘set key’ this enables me to create frames manually and have more control over this particular animation sequence.

 I used the object properties to reduce the visibility of the bullet to 0.0 so as it would not be seen on rendering once it has impacted into the logo.


Track View Curve Editor enable the fine adjustments and smoothness to the animation.  

A target camera was installed on this scene. Using the timeline and key frames this enabled me adjust and move the camera through the scene and reposition it as the bullet impacts into the logo, giving a more beneficial effect and enabling the viewer to see the bullet coming and the logo from a bird’s eye view.

Animating of the Cocking 007 Gun and Bullet

Animating of the Cocking Walther PPK
The making and animating of the cocking handgun is relatively simple as it mainly uses only key frames for it to function.

The handgun itself was constructed earlier when designing and creating objects. The handgun was then imported into the scene along with a bullet, that was constructed in illustrator and imported into 3DS Max where the Lathe tool was applied to it and a golden material to give the bullet its colour. The bullet was split into two parts using edit poly and welding up the ends where the object was split.

The top of the handgun and trigger were then animated on the timeline using the auto key frame so that it would slide back along with the trigger.


Half way through this animation the bullet was positioned and using key frames on the timeline was animated so that it looked as though it was ejecting out of the guns barrel.


The bullet was animated in the same way as above but was positioned so that it would travel out of the front of the barrel as the top of the gun was firing back. This was created using key frames on the timeline. Using the Track View Curve Editor the animations were finalised and smoothed with more precise and detailed adjustments and timing.


Cameras and lighting were then positioned into the scene. The effects of fog that surround the gun are formed by adding a noise modifier in the setup of the light beam.


 Using target cameras and lighting the bullet and movements of the cocking gun could be captured smoothly and always remain lit. The camera and lighting were locked onto the target objects using the ‘Link’ tool.

Animating of the Goldeneye Logo

The Animating of the Goldeneye Logo (Opening Scene)

The Goldeneye logo is the one of the animations was that introduced to the animation scene because it allowed me to make use of the particle superspray and reactor. The particle superspray allows me to be able to animate the effects of the smoke with the aid of creating a material that gives the impression of smoke. 


The rigid body collection reactor enabled me to easily produce the effects of the text falling from a height and landing on the ground with a smooth bounce. I felt this animation has enabled me to advance and practice my skills using reactor and superspray. 
The Making of the Smoke

The making of the smoke begins with first creating the word text. I did this by adding the text to the scene and editing it with font and seizing. I then added materials to the text to give an impression of a dented metal material. The dented effect was added by adding the dent modifier to the material then adjusting the colour accordingly.

Once the text has been created I then begun to create the smoke effect. The smoke effect was produced but first adding the Particle Superspray to the scene and positioning it in the middle of the text.
On the modifier panel of the superspray the ‘hose’ was loaded from the load and save presets. The settings that I used were as follows for the superspray.
Adjusted to Dots in particle type
Adjusted              Spread - 49.0
 Size       - 15
Grow     - 50
Fade      - 50
Standard Particles to facing
Spin Time – 38

I found that these were the best settings for creating the best smoke effects with the material that I had created.

Creating the material for the Smoke


To create the appropriate material in order to get the best smoke effect a material was formed by reducing the gloss effect to 0 then by adding a gradient modifier to the opacity.


In the gradient modifier the colours were adjusted to a smoke like colour and a smoke modifier added to the 3rd colour. In the smoke modifier the settings were adjusted accordingly: 

Size – 10
Literations – 4
Facing Map – On
Returning back to the default material the Racial was switched on, this gave the effect of the smoke becoming round as opposed to being square. The smoke material was then imported onto the Superspray and the Superspray was then linked to the text and duplicated twice.

Logo Animation

To create the dropping effect of the text with the smoke, two planes were introduced as backgrounds with material modifiers imported on to them, similar to the word text material.
Rigid Body Collection was then added to the scene and using the reactor editing panel the mass of the text was adjusted to 10.0 while keeping the planes to a mass of 0.


The planes were changed to have concave mesh effect added and then the animation was produced onto the scene.


Cameras and lighting where then added to the scene and the production rendered.