Animating the Goldeneye Train
This scene consisted of using my object Artifact - The Goldeneye Train. I also created train tracks, trees, a tunnel and landscaping for this scene.
Train Track and Tree

The train track consists of simple shapes, such as the track sleepers and bolt nuts created from hexagons and boxes. The track itself was created from a long rectangle and edited into shape using the editable poly. For the tree creation please refer to: Artifact 5 – Scenery Tree
Materials were then added to the train track, sleepers and bolts.

Landscape

The landscape to the scene is a very large plane, converted to editable poly’s and then with the ‘Soft Selection’ tool on, the plane was shaped into a landscape design.
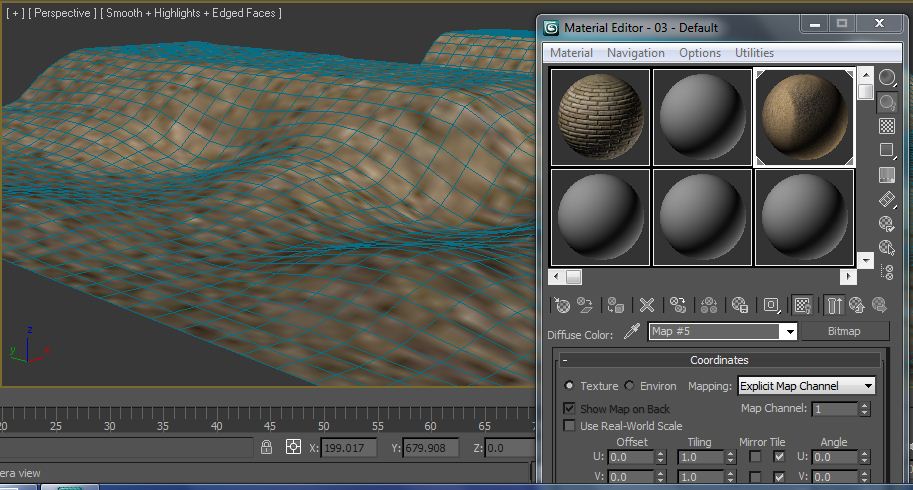
I then added a texture mapping material to the plane, using the bump tool to give it more depth and UV Mapping to adjust the material layout.
Tunnel

The tunnel was created from the outline of an image of the front of a tunnel using Adobe Illustrator. By importing the image into 3DS Max I then applied the extrude modifier to turn the tunnel into a 3D model.
Material mapping of brick work was then applied with a bump modifier and UV Mapping in order to adjust the material mapping.

Moving Train (Part 1)
For the creation of the Goldeneye train please refer to: Artifact 3 Goldeneye Train
The Goldeneye train was imported into the scenery along with the Smoke that was created from a superspray in the first opening scene, Smoking Text. I then added the smoke along with the smoke material onto the train. The train was then grouped together to enable easier movement via the Group Tool.

Using the timeline and key frames the train was animated so that it would move out of the tunnel and towards the other side of the scenery.
Start:

End:

Using the Track View Curve Editor, this enabled me to adjust the movement of the train so that it would slowly come to a stop, not just a complete sudden stop. This made the movement of the train more realistic.

Using a Target Camera enable me to produce an animation effect where the camera follows the train in its movement. The train was linked to the camera using the ‘Link’ tool.
Once happy with the settings and setup this first section of the scene was rendered.
Exploding Goldeneye Train (Part 2)
Keeping the Goldeneye train in the same position as from the previous scene I used the ‘Mesh Bomb’ tool, this can be found in the ‘Space Warps – Geometric’ category from the creation panel. Once the Mesh Bomb was planted underneath the Goldeneye Train I then edited the settings to create a smooth outward explosion of the train.

Settings are as follows:
Explosion:
Strength = 1.3
Spin off = 1.0
Fall off = 100.0
Fragment Size
Min = 5
Max = 20
Gravity = 1.07
Once these settings were applied I then used another creation tool known is 3DS Max as ‘SphereGizmo’. This fire explosion effect can be found in ‘Helpers – Atmospheric’ creation panel. I used this creation tool to give the impressive explosions as the Goldeneye Train is ripped apart with the Mesh Bomb tool. The ‘SphereGizmo’ was then placed and sized onto the scene.

In the modifier panel of the SphereGizmo the ‘Fire’ effect was loaded.

In the modifier panel of the SphereGizmo the ‘Fire’ effect was loaded.

Then going into the setup panel of the Fire effect I made adjustments to the Fire explosion here, I modified settings to enable the explosion to be the correct timing of the Mesh Bomb explosion and to last just as long. The size and force of the fire explosion can also be modified in this setup panel along with the smoke and other colour effects.
To create the skyline effect a 'Sky' image was imported into 3DS Max and placed as a background map. This is done by adding the image to Rendering, Environment then Background mapping.

To create the skyline effect a 'Sky' image was imported into 3DS Max and placed as a background map. This is done by adding the image to Rendering, Environment then Background mapping.

Once happy with the settings this second section of the scene was rendered.

No comments:
Post a Comment