Animating the Plane
Plane Creation
The plane was created originally from a rectangle that was converted into an editable poly. Using an Aeroplane image on a plane I then crafted the main structure of the planes body including tail wing and then deleted the image I was using to shape from.
Once the planes body was crafted on one side it was duplicated and mirrored so that the two parts could now be welded together and a turbo smooth modifier added to them to create a smooth effect.
After Mapping Applied:
The process for the creation of the body of the plane is almost identical to the creation of the wings.
Once the plane was completed simple landing gear was created from the ‘Damper’, ‘Cylinder’ and ‘lathe’ tool to make a simple wheel on suspension.
The landing gear was added to the aircraft and so was self created material mapping for the plane and wings.
The material used for the plane was created using Windows Paint.
The rotating propeller was created but rotating the propeller over a few key frames.
To enable the propeller to continuously rotate the ‘Loop’ tool was switched on in the Track View Curve Editor.
Motorbike
The motorbike is a 3DS Max file imported from a website, I slowly begun to run short on time and found that self creating more objects was becoming time consuming.
Import Reference: http://www.3dvia.com/models/BFD263B58799ABBD/duc916-l
Animating the Motorbike and Biped
James Bond Figure and Biped
To create the James Bond Figure I used a pre-made figure that was imported to the scene.
Import reference: http://www.3dvia.com/models/667D4A5C6E405264/flic
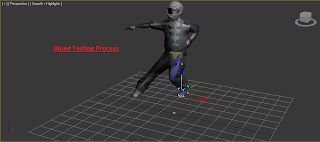
Using the ‘Biped’ tool I created a skeleton inside of the figure and linked the sectors of the Biped parts to the figure. This was done by adding names to each of the Biped parts and applying a Physique modifier to the figure in order to attach the biped sectors inside.
Once all of the sectors of the Biped were loaded into the Figure I then edited the Envelopes, this can be found within the Physique modifier. This enabled me to edited the envelopes and adjust how and what parts of the figures skin was affected by each sector of the Biped.
Testing was carried out to ensure all sectors of the biped were affecting the correct areas of the figure upon movement.
Once all was completed the final figure could now be moved into shape in order for it to be placed onto the motorbike object.
The rotating of the wheels was done in the same way as the Aircrafts propeller and using the loop tool in Track View - Curve Editor to make it continuiously turn.
Once the creation of these animations where finished they were saved and ready for importing into the plane chase scene.


No comments:
Post a Comment